Flat Fingers vs Curved Fingers in Piano: When Should You Use Each? (Beginner to Intermediate Guide)
Introduction
One of the most common things students hear in piano lessons is:
👉 “Curve your fingers!”
So naturally, many students try to keep their fingers curved all the time.
But then confusion starts:
“Why does my teacher suddenly allow flatter fingers?”
“Am I doing it wrong if my fingers are not curved?”
“Which one is correct?”
This is where many beginners — and even intermediate students — get stuck.
The truth is:
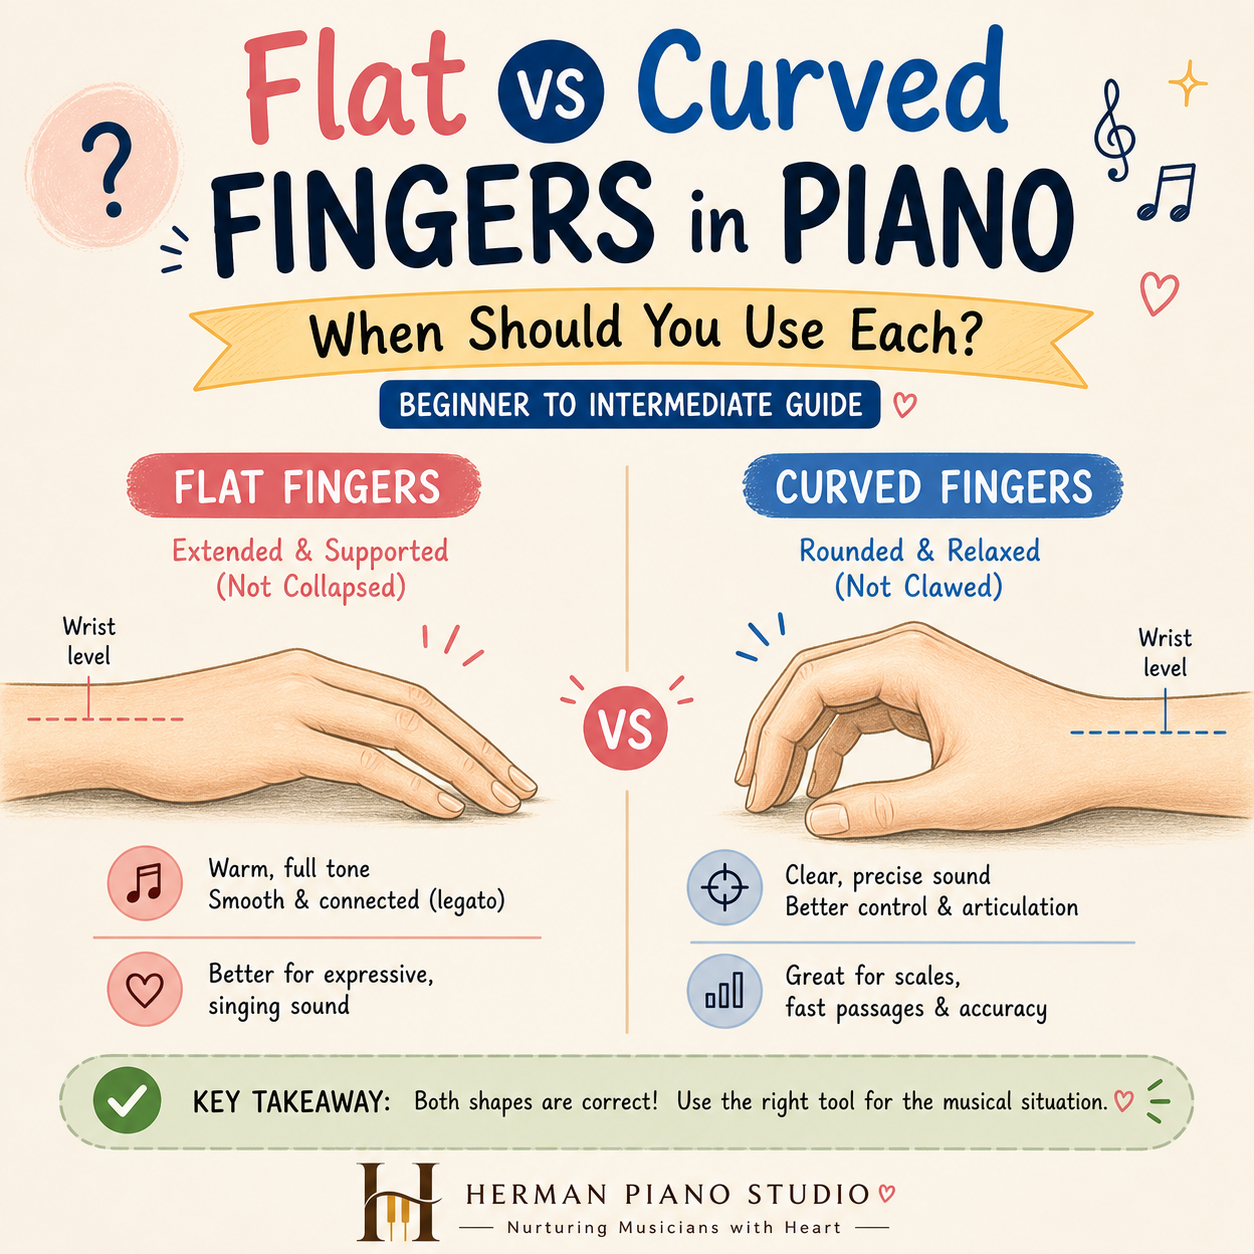
👉 Both curved fingers and flat fingers are correct — but used in different situations.
Understanding this is a key part of developing proper piano technique, especially for students taking piano lessons for beginners or preparing for ABRSM exams.
What Are Curved Fingers?
Simple Explanation
Curved fingers mean your fingers are naturally rounded, like you are gently holding a small ball.
Knuckles are lifted
Fingers are not collapsing
Contact is usually on the fingertip
When They Are Used
Curved fingers are most commonly used in:
Scales and technical exercises
Fast passages
Clear, articulated playing
Beginner training
Benefits
✅ Better control and precision
Curved fingers allow you to press keys accurately, especially in fast or detailed passages.
✅ Stronger finger independence
Each finger can move more clearly without collapsing.
✅ Cleaner sound
Notes sound more even and controlled.
👉 This is why most piano teachers in Singapore (including those teaching ABRSM) emphasise curved fingers early on.
What Are Flat Fingers?
Simple Explanation
Flat fingers mean the fingers are more extended, with less curve, and more surface of the finger touching the key.
Fingers are longer and more relaxed
Contact is closer to the finger pad (not just the tip)
When They Are Used
Flat fingers are often used in:
Singing, expressive melodies
Legato playing (smooth connection)
Soft, warm tone production
Chord playing (for balance and weight)
Benefits
✅ Warmer, fuller tone
More surface contact creates a richer sound.
✅ Better legato control
Helps connect notes smoothly without gaps.
✅ Relaxation
Reduces tension in slower, expressive passages.
The Biggest Mistake Students Make
The biggest mistake is this:
👉 Trying to use only ONE finger shape for everything.
Many students think:
“Curved fingers = correct”
“Flat fingers = wrong”
So they force curved fingers even when:
Playing slow lyrical music
Trying to produce a soft tone
This leads to:
Tension
Harsh sound
Lack of musical expression
On the other hand, some students overuse flat fingers and lose:
Control
Accuracy
Clarity
👉 Good piano playing is not about choosing one —
It’s about choosing the right tool for the musical situation.
When to Use Curved Fingers (Practical Situations)
Use curved fingers when you need:
🎯 Precision and clarity
Example:
Fast right-hand runs
Scale passages
🎯 Control in beginner stages
For students in piano lessons for beginners, curved fingers help build:
Strong foundation
Proper coordination
🎯 Evenness in playing
Example:
Technical exercises
Repeated patterns
👉 Think of curved fingers as your “control mode”
When to Use Flat Fingers (Practical Situations)
Use flat fingers when you need:
🎵 Expressive, singing tone
Example:
Melody lines in slow pieces
Romantic-style music
🎵 Smooth legato playing
Flattening slightly helps connect notes naturally.
🎵 Weight and balance in chords
Using more finger surface allows:
Better distribution of weight
Fuller sound
👉 Think of flat fingers as your “sound and expression mode”
How to Train Both Techniques (Step-by-Step Practice Tips)
Step 1: Train Curved Fingers First
Start with:
Scales
Simple exercises
Focus on:
Rounded shape
Firm but relaxed fingers
Step 2: Add Flat Finger Awareness
Choose a simple melody and:
Play with curved fingers
Then play again with slightly flatter fingers
Listen to the difference
👉 This builds sound awareness
Step 3: Combine Both
In real music:
Use curved fingers for fast notes
Use flatter fingers for expressive notes
Practice slowly and decide:
👉 “What sound do I want here?”
Step 4: Use Teacher Guidance
A good piano teacher in Tampines or elsewhere will guide:
When to adjust finger shape
How to avoid tension
Common Problems and Fixes
❌ Problem: Fingers collapsing
👉 Fix: Lift knuckles slightly and return to curved shape
❌ Problem: Playing sounds too harsh
👉 Fix: Use slightly flatter fingers and more relaxed touch
❌ Problem: Cannot play smoothly
👉 Fix: Reduce finger lifting and allow more finger contact
❌ Problem: Tension in hand
👉 Fix: Avoid forcing any shape — stay flexible
Conclusion
Curved fingers and flat fingers are not “right” or “wrong”.
👉 They are tools.
Curved fingers = control, clarity, precision
Flat fingers = tone, connection, expression
The best pianists know how to adjust naturally depending on the music.
For students and parents, the key takeaway is:
👉 Don’t force one method — learn when to use each.
With proper guidance and structured piano practice tips, students will develop both technique and musicality — which is exactly what we focus on at Herman Piano Studio.